
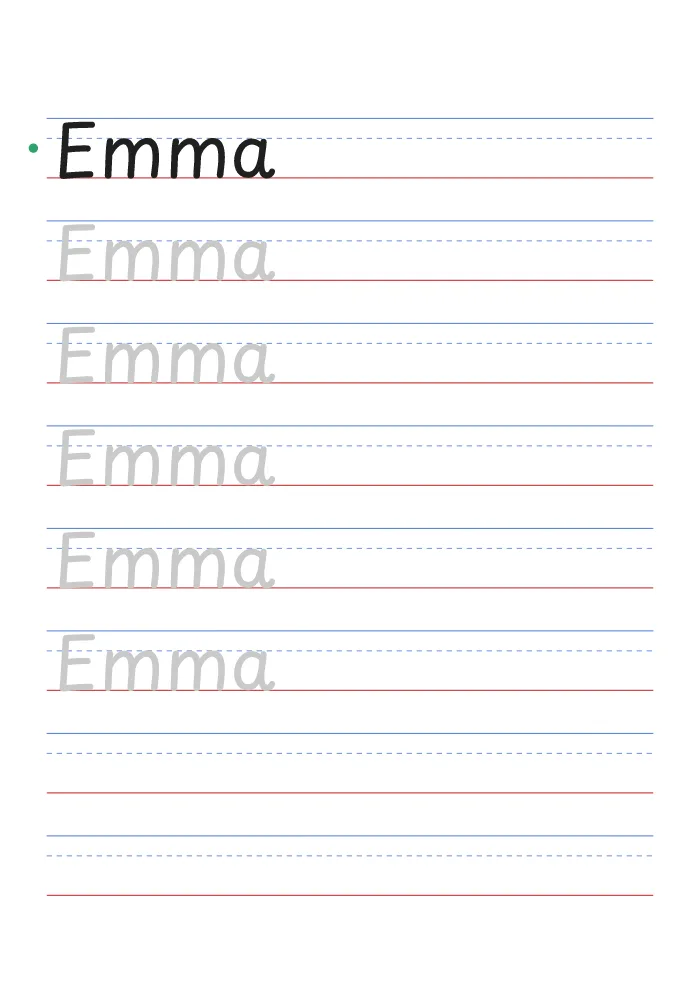
How do you make a name tracing worksheet?
Type the name in the box, pick how many rows to trace, and press Print worksheet or Download PNG. The preview updates as you type, so you see the finished page before printing. It works like an editable name tracing template, without opening Word or Google Docs.
- Type the name. Up to 24 characters, so a first and last name with a space fits. Use a capital first letter and lowercase for the rest, the way the child will write it at school.
- Choose the rows. 3 rows gives the biggest letters, 5 is the middle size, and 7 rows gives smaller letters and more practice on one page.
- Keep or remove the empty rows. The two blank rows at the bottom are for writing the name with no gray letters underneath.
- Print or download. Print opens the page in a new tab and starts printing. If your browser blocks pop-ups, use Download PNG and print the file.
Each sheet uses Playpen Sans, a rounded, upright handwriting font that is close to the print style taught in preschool and kindergarten. The first row is dark, with a small green dot on the left where the row starts. There is a "Name" line at the top of the page too. The rows below are light gray to trace over. Every row has three guide lines: a blue top line, a dashed blue middle line and a red baseline the letters sit on.
How do you teach a child to trace their name?
Sit next to the child, trace the first letter yourself while saying its name, then guide their hand through the same strokes. After that, let them trace on their own and only step in when a stroke goes the wrong way. A few calm minutes every day teach more than one long session a week.
- Check the grip first. A tripod grip (thumb, index and middle finger, pencil resting on the middle finger) gives the most control. Short, fat pencils or broken crayons nudge small hands into that grip.
- Start on the left, by the green dot. Point to where the first letter begins, and remind them that we write from left to right across the row.
- Go top to bottom. Most letter strokes start at the top line and pull down. Lines that go bottom to top are a habit worth fixing early, before they set in.
- Capital first, then lowercase. A name is written with one capital letter and the rest lowercase. Teach "Mia", not "MIA", even if the child already knows capital letters better.
- Say the letters out loud. Naming each letter while tracing it connects the shape, the sound and the name.
- Keep it short. Five to ten minutes is plenty for a young child. Stop while it is still fun and come back tomorrow.
If the child struggles with a single letter, practice it alone on the alphabet tracing worksheets, which have one letter per page, then come back to the name.
Name tracing tips by age
Match the sheet to the child's hand, not their birthday. Younger children need bigger letters, fewer rows and more help; older ones can handle smaller letters, the blank rows and their last name. Children develop at very different speeds, so use these as starting points.
- Ages 3–4: use 3 rows for the largest letters, a crayon or chunky pencil, and expect wobbly lines. Tracing with a finger first is fine. Even tracing just the first letter of the name is a good start.
- Ages 4–5: try 5 rows and the whole first name. Ask the child to stay close to the gray letter rather than perfectly on it, and praise starting each letter at the top.
- Ages 5–6: switch to 7 rows and keep the empty rows on. Most of the work moves to writing the name alone. Add the last name once the first name comes easily.
Reuse one sheet: laminate it and use a dry-erase marker
Laminate the printed page, or slide it into a clear sheet protector, and the child can trace it with a dry-erase marker, wipe it clean and start again. One sheet then lasts for weeks of practice, which suits classroom centers and morning work.
Thin dry-erase markers give better control than thick ones. Keep a pencil version for some days too, because a pencil drags on paper and builds more hand strength than a slippery marker.
First and last name tracing
Type both names with a space between them, such as "Leo Martinez". Long names print smaller to fit the row, so pick 3 or 5 rows for a full name to keep the letters a good size. Another way is to make two sheets, one for the first name and one for the last.
Name tracing for siblings and class lists
The tool makes one name at a time, and each one takes seconds. For a class, type a name, download the PNG, change the name and download again; every file is saved with the child's name. For siblings, give each child their own sheet so nobody is tracing a sister's or brother's name by mistake. Teachers often print a sheet for the first week of school and laminate it for the writing center.
Bigger rows for younger kids and children who need more help
Fewer rows means bigger letters. The 3-row setting suits children who are still building hand control, kids with fine motor delays, and anyone with low vision. Pair it with a pencil grip, a slanted surface such as a binder turned sideways, or tracing first with a finger or a highlighter before switching to a pencil.
How to print name tracing worksheets on A4 or US Letter
The worksheet is an A4 page. On A4 paper, print at 100%. On US Letter, choose Fit to page or Scale to fit in the print dialog so the edges and the bottom row are not cut off. Plain copy paper is fine for pencil; use cardstock if you plan to laminate.
Once the name is easy, make it fun: print the name in big outlined letters to color from the printable bubble letters, or pick a page from the graffiti coloring pages to color the first letter of the name.